_360065931812.jpeg?width=670&height=470&name=Quidel%20Sofia%202%20Configuration%20Guide%20()_360065931812.jpeg)
Before you start: Add device to the Relaymed Link or Relaymed Software Agent
For practices using the Relaymed Link, log in to your Relaymed Portal and follow these steps:
Adding a Device to Relaymed Link
For practices using the Relaymed Software Agent, open the server or PC where the agent is installed and follow these steps:
Adding a Device to Software Agent
Back to the device - Connect the device to your network
Step 1: Connect the Quidel Sofia 2 to the Ethernet port on the back of the device. Connect the other end to an active Ethernet wall port or switch.
Device configuration steps
Important! Log into the Sofia 2 as Supervisor -- User ID: 1234
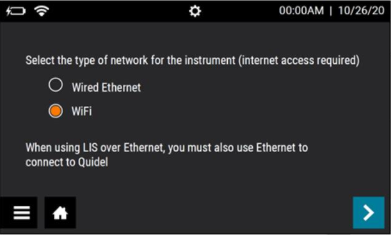
Stage 1: Network Connection
-
Decide whether you'd like to connect the device using Ethernet or Wifi
- If Ethernet
- Connect the device to a network drop / switch
- Supervisor Menu >> Network Interface >> Wired Ethernet
- If Wifi (available from firmware version 1.12)
- Go to Supervisor Menu >> Network Interface >> Wifi >> Select network and enter password
- Quidel docs for connecting to Wifi: https://connectme.quidel.com/docs/updates/connecting/connecting-wifi/
- Go to Supervisor Menu >> Network Interface >> Wifi >> Select network and enter password
- If Ethernet
- To set up DHCP connection, select Supervisor Menu >> Network Settings >> Ethernet Settings >> Select DHCP >> checkmark to save the settings
Stage 2: LIS Connection
- Supervisor Menu >> Network Settings >> LIS Settings:
- LIS IP Address - the private static IP of the Relaymed Software Agent's host
- LIS Port - the port allocated to the device on the Relaymed Software Agent
- Select the “>” to move to the next screen
- Auto Send >> On

- Select "ASTM/LIS" if prompted for the Connection Protocol.
Stage 3: Test Device Connection
- To test the device connection, select the hamburger menu icon >> Send Data >> Test Connection.
Reference: https://connectme.quidel.com/docs/lis/sofia-2/connecting-sofia2/